Printer sharing is one way to utilize printers on a local network. By sharing a printer, we can print documents from another computer without having to move files or connect a printer cable to the computer that wants to print. Sharing printers can also save costs because we don't need to buy a printer for each computer.
Benefits of Printer Sharing
Printer sharing is a feature that allows users to share printers connected to a computer with other computers on a local network. The advantages of sharing a printer include:
Save cost

With Windows printer sharing, users don't need to buy a printer for each computer, but just one printer that can be used together. This can reduce spending on printer hardware and ink.
Increase efficiency

With Windows printer sharing, users do not need to move computers to print documents, but simply send documents to the printer that has been shared. This can save users time and effort.
Makes collaboration easier

By sharing Windows printers, users can print documents created by other team members without needing to send files first. This can speed up the collaboration process and improve the quality of work results.
Windows XP Printer Sharing Steps
To share a printer in Windows XP, there are several steps that we must follow. Following are the steps:
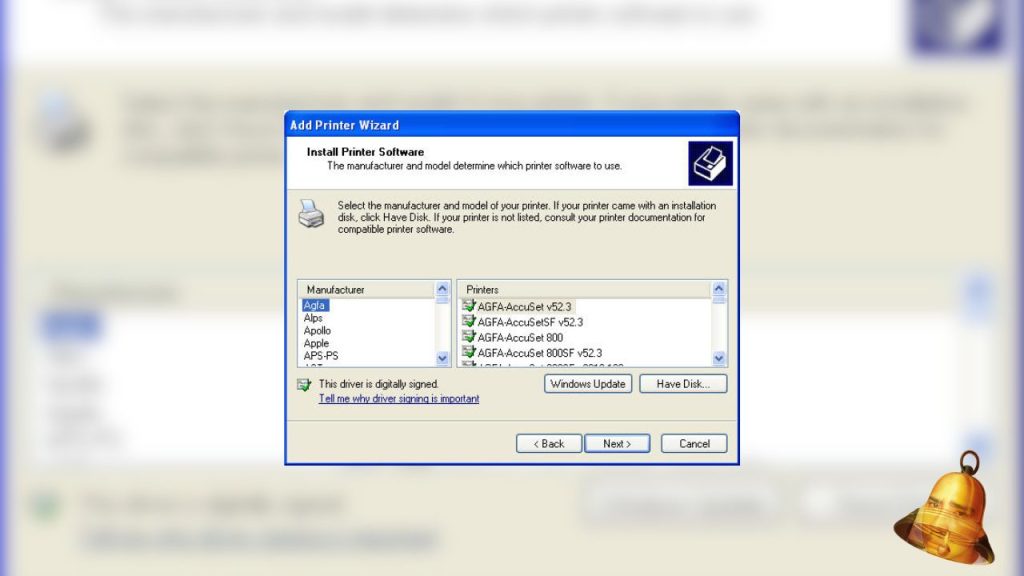
Make sure the printer you want to share is connected and installed correctly on the computer that is the host or source of the printer. If not, follow the installation instructions in the printer driver manual or CD.
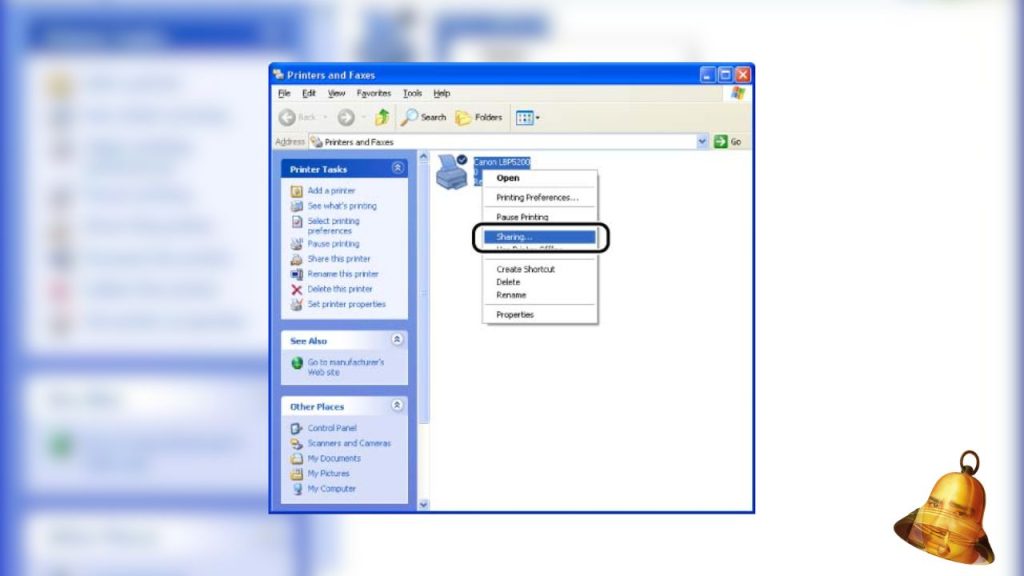
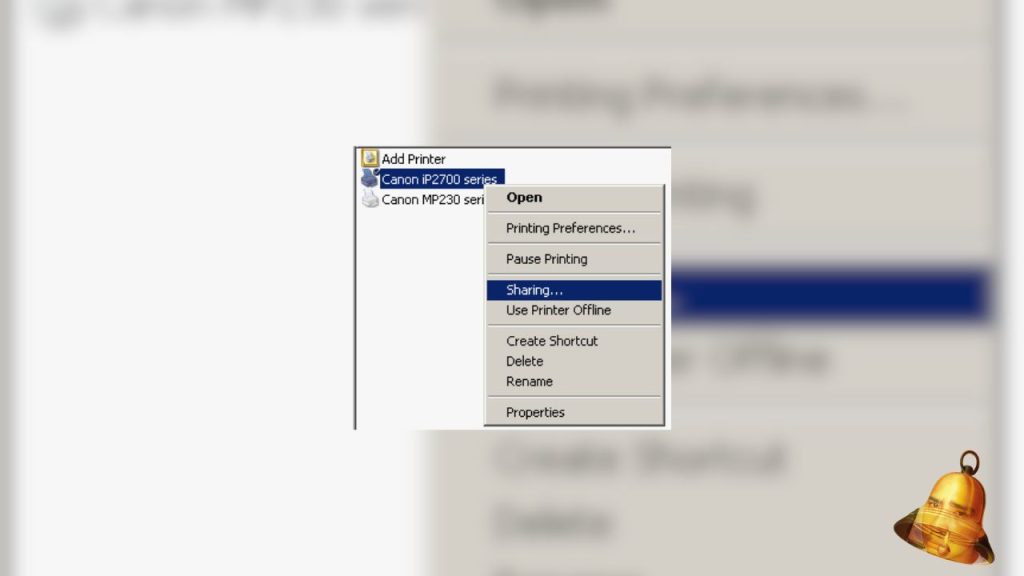
Open Control Panel, then select Printers and Faxes. Right click on the printer icon you want to share, then select Sharing.
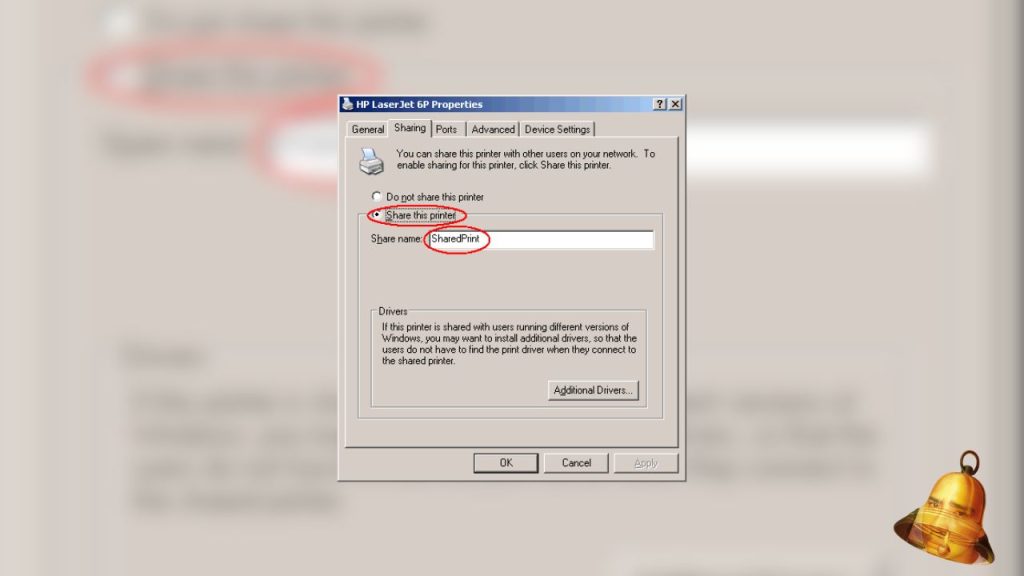
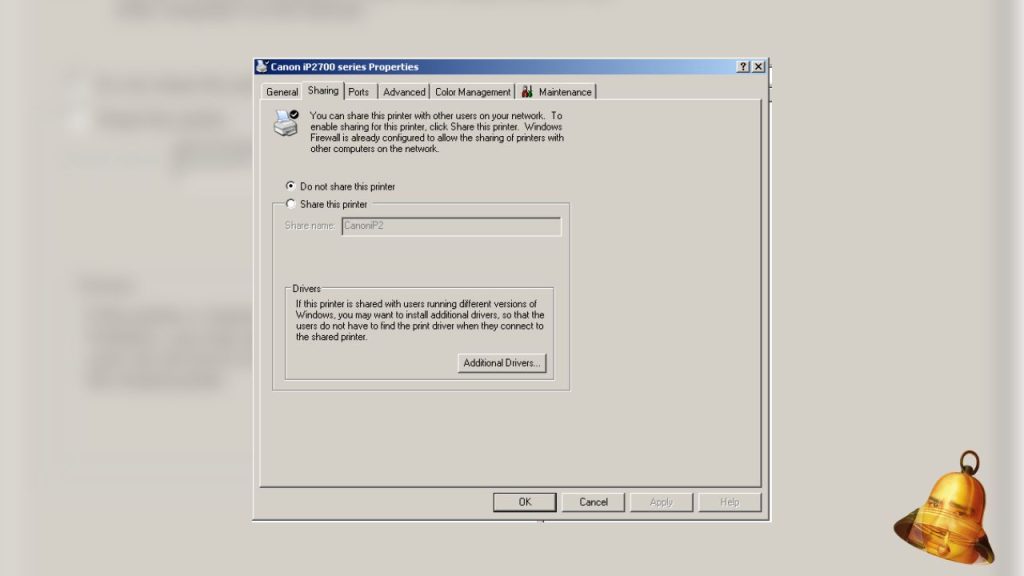
On the Sharing tab, select the Share this printer option, then give a name to the shared printer. This name will be used by other computers to access the printer. Click OK to save the settings.
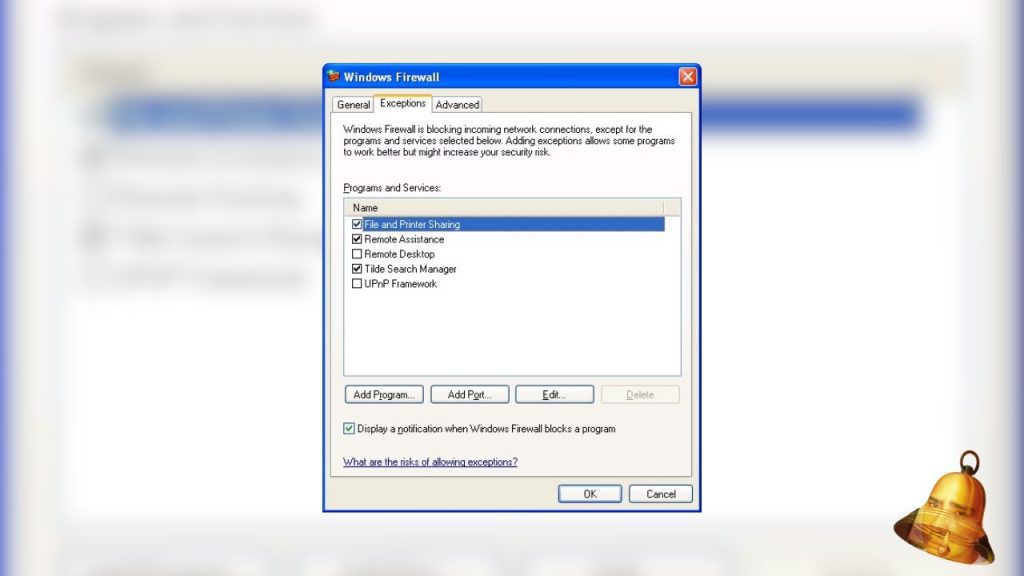
Next, we must set the firewall on the host computer so that it does not block access to the shared printer. Open Control Panel, then select Windows Firewall. On the Exceptions tab, check the File and Printer Sharing option, then click OK.
You have successfully shared your printer with other people on the same network. This printer can be used by anyone connected to the network. However, before you can print documents, another computer must first connect to the printer that has been shared.
Here is how to connect another computer with this printer:
- Open the Start Menu
- Select My Network Places
- Find the server menu on the shared network
- Find the printer that has been shared too, then double click it.
- After that, the computer will install the driver, wait until it finishes
That's how to share a Windows XP printer easily and quickly. Hopefully useful and good luck!